Tuesday, September 17, 2013

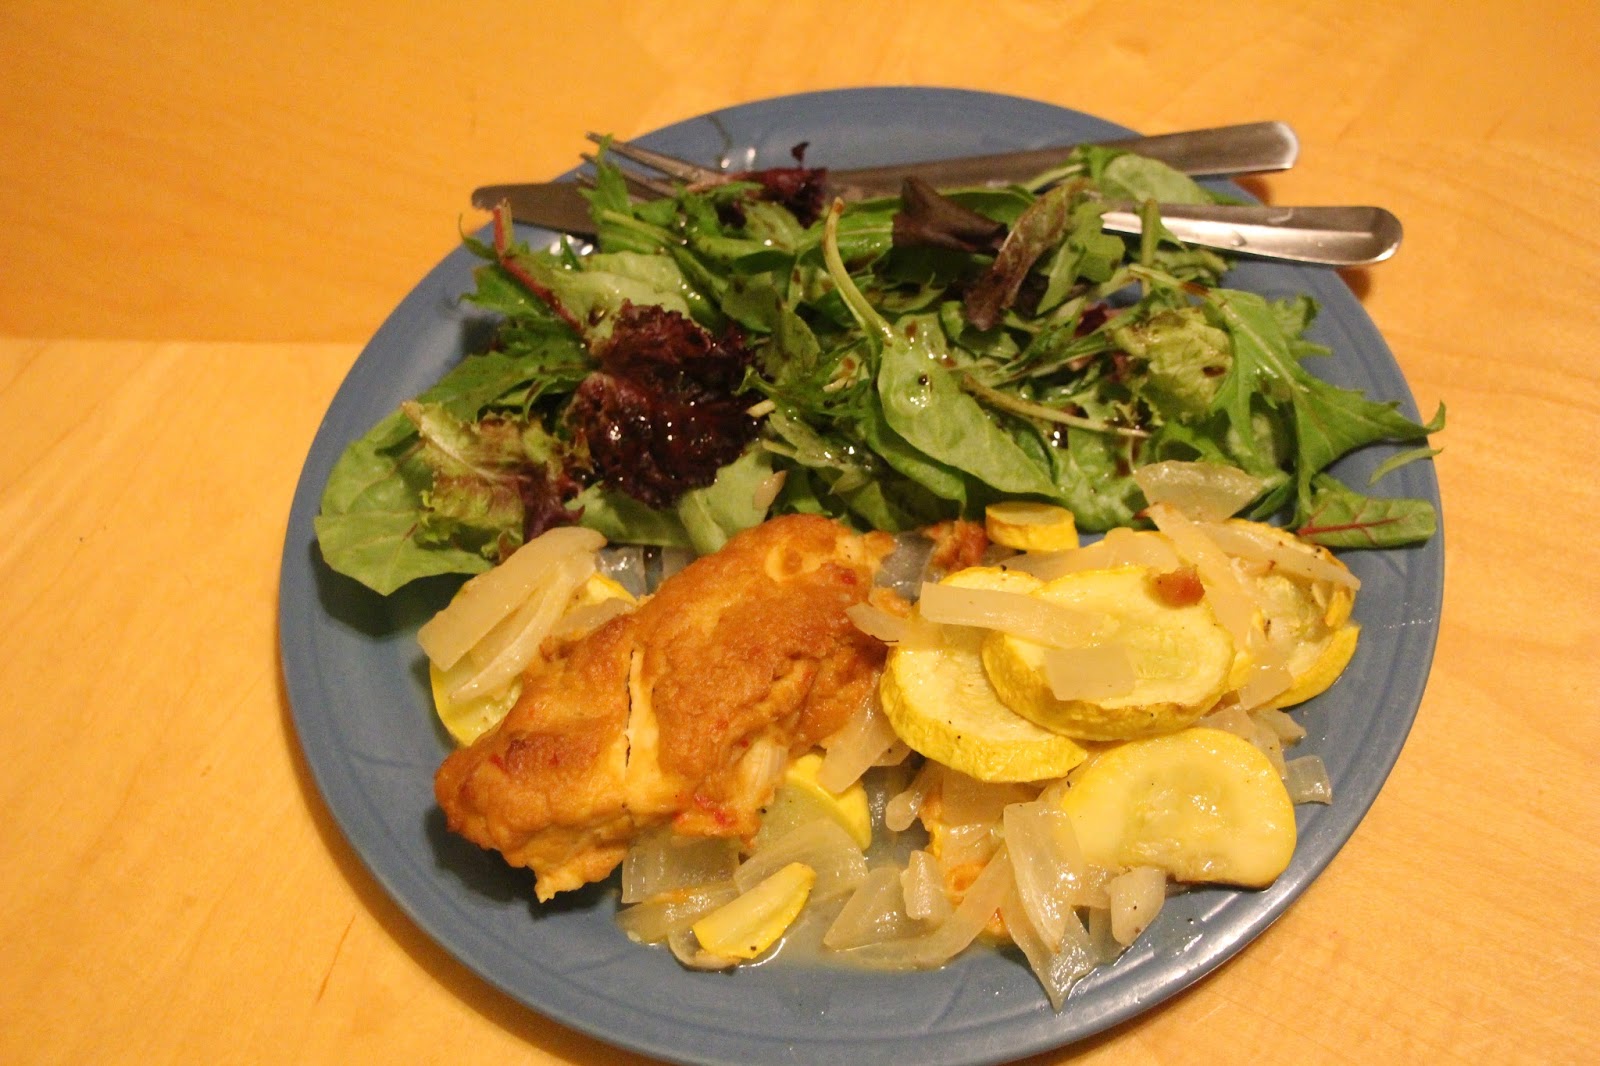
Hummus Crusted Chicken

This recipe is at the top for this blog. It fills all of my criteria so perfectly.

It's...
1. healthy
2. cheap
3. easy
4. fast
5. delicious
Without further ado I present hummus crusted chicken. you're welcome. this recipe serves 2 but you can obviously make it for way more people. As an extra bonus I sliced squash and onions and cooked them under my chicken breast in the dish. I love when the sides and the meat can be made together cause I'm lazy like that.

Ingredients
  • about 6 tablespoons of hummus ( I love red pepper hummus from sabra)
  • 2 chicken breasts
  • salt and pepper, to taste
  • 1 lemon or 4 tsps of lemon juice
Steps
  1. Preheat oven to 450 degrees
  2. coat a baking dish with cooking spray or olive oil
  3. place chicken breasts in baking dish, and sprinkle with salt and pepper
  4. smooth hummus on to the top of each chicken breast (!!don't contaminate your hummus with raw chicken by using it straight from the container!!) I've done it thick and thin and both is good but at least do it thick enough so that you can't see the chicken breast through the hummus.
  5. squeeze half a lemon over each breast
  6. Bake for 30 minutes until chicken is cooked through.
  7. Enjoy!
after cooking! i could've spread my hummus prettier but no one at my house cares

Sunday, August 18, 2013

Peach Crisp (GF/DF)

   I love peaches so living in Georgia is awesome during peach season...which is now, so I'm about to post a couple of my favorite peach recipes; although my favorite way to eat them is plain. Peach cider is amazing too (I like drinking it with champagne (bellini much?) or with Bacardi Razz rum. However, this peach crisp is delicious. It's gluten and dairy-free too!


Ingredients


Peach filling:
  • 6 peaches
  • 1 tbsp gluten free flour mix
  • 2 tbsp agave
  • 1 1/2 tsp cornstarch
  • 1 tsp cinammon
  • 1/2 tsp nutmeg
  • 2 tsp lemon juice
  • 1/2 tsp vanilla extract
Crisp topping:
  • 6 crumbled gluten/dairy free sugar cookies- not chewy (Enjoy Life or Lucy's are great)
  • 1/2 C of rolled oats
  • 3 tbsp gluten free flour
  • 1/4 C brown sugar
  • 1/4 tsp salt
  • 4 tbsp of dairy free spread (Earth Balance) or butter
Steps:
  1. Preheat oven to 425 degrees.
  2. Peel and thinly slice peaches. The easiest way to peel peaches is by putting them in a pot of boiling water then plunging them in ice water after a minute. The skins should just rub off.
  3.  Mix all crisp topping ingredients in a bowl then use a pastry knife to cut butter into the mix. If you don't have a pastry knife (I don't) use two knives to cut butter in bowl alternating directions until it's in tiny clumps. For an example see this youtube video. You're welcome. 
  4. Mix all peach filling ingredients together in a separate bowl. Pour into a small baking dish (I used a square 9x9)
  5. Cook peaches in over for 10 minutes, remove, and pour crisp topping on top covering completely. Bake in the oven for 30 minutes or until brown. 
  6. ENJOY! I served mine with coconut vanilla ice cream. Store leftovers in fridge :) Enjoy again!

Thursday, August 15, 2013

Easy Banana Muffins! (GF/DF)

So today I was going to finally use those overripe bananas that I've been storing in the freezer to make banana bread. Then I realized, I don't have a bread loaf pan...so I decided to make banana muffins! Some people know this (but my blog is for the beginner!) but overripe bananas are the best to use for baked goods. When your bananas get too ripe to eat (the outsides black) but they're not rotten, throw them in the freezer and defrost them for your next banana bread or in this case banana muffins! They turned out pretty good. I did mine the gluten-free and vegan way but that's because we ran out of eggs (but not flax powder go figure haha this is my life now) and I can't eat dairy or gluten. If you don't do it gluten free or vegan, use an egg instead of the "flax egg", and use normal flour in place of the gluten-free all purpose flour. So easy either way! Which is just the way I like my muffins. The nice thing about this recipe is it's so flexible you can just keep adding ingredients (cinnamon, raisins, chocolate chips, yogurt chips, etc!)
I forgot to take a picture so this one will have to do

Ingredients:
  • 1 1/2 c all-purpose flour or gluten free flour blend
  • 3/4 c sugar
  • 1 tsp baking soda
  • 1/2 tsp salt
  • 1 tsp cinnamon
  • 1 cup chopped nuts OPTIONAL (I used walnuts)
  • 3 ripe bananas (if you're bananas were frozen or not extremely over ripe, pop them in the microwave for a bit so you can easily mash them)
  • 1 "flax egg" or 1 egg ***
  • 1/3 c vegetable oil
  • 1 teaspoon vanilla extract
***you can make an easy and healthy substitute for eggs in baking. For substituting one egg- take 1 tbsp of ground flax powder (if you have flax seeds you can put them in a food processor to grind them up yourself) then ADD 3 tbsp of water (the water HAS to come 2nd). Mix then set in fridge for 15 minutes until consistency is thick and somewhat...well...egg-like.


 Steps:
  1. Preheat oven to 375
  2. In a large bowl mix all dry ingredients together. In a separate bowl mash bananas then add remaining wet ingredients. Add dry ingredients to the bowl of wet ingredients and mix well.
  3. Spoon into muffin cups filling about 1/2-3/4 of the way full.
  4. Bake in the oven for 18-22 minutes or until a toothpick comes out clean. 
  5. Enjoy!


Friday, July 12, 2013

Vegan Chili and Vegan Breakfast Scramble (CAMPFIRE FRIENDLY)

 I am once again thrilled and honored to be a guest chef on this kick ass cooking blog. So Colleen, Shannon, and I, and our corresponding partners, decided to go camping last weekend at Tallulah Gorge (yes it rained all weekend if you must know, but we still had a great time)  Since fully half of us are Vegan-or mostly Vegan- I found some hearty recipes online.  These taste incredible, vegan or not, and got a major thumbs up from the non-vegetarians in the group. 
 Cheers!  Cathy
Vegan Chili (good over sweet potatoes or served solo) 
Photo from http://truthandthelife.com/

Sunday, July 7, 2013

Easy Refrigerator Pickled Beets

   Short anecdote to start this recipe (of course, right? you should be used to this by now). The boyfriend really wanted us to grow two rows of beets in the garden. I didn't really want to because I don't like beets but I finally gave in. Fast forward a month or so later and he is eating a chopped up beet and complaining that his throat itches and he might be allergic to beets. Which really frustrates me because what the hell are we going to do with all of these beets if he's the only one who likes them but he somehow has developed an allergy to them? A week later I tell my mother this story and she bursts out laughing once she realizes that the boyfriend was eating the beet from our garden raw. Apparently this is something you don't do with beets. We had no idea.
      So today I picked some beets from the garden and looked up the best easiest and fastest way too cook them and preserve them. I didn't want to get super involved with canning etc so I looked up an easy pickling recipe that can keep in your fridge for 6 months (or so the recipe says). Even better than that I actually really liked it. Which is amazing because like I said I've never liked beets! Being the queen of google I also looked up the best way to cook and peel the beets. You're welcome.

Supplies:
  • Large Mason Jar
  • two handfuls of fresh beets (large or small)
  •  2 cups sugar
  • 2 cups cider vinegar
  • 2 cups water
  • 1 1/2 teaspoons of salt
  • 2 tablespoons of cinnamon
  • 2 teaspoons of nutmeg
Steps:
  1. Cut the stems off of beets leaving about 1/4". You can keep the leafy parts for greens or throw them out. 
  2. Wash beets just enough to get the dirt off
  3. Fill a saucepan with enough water to cover the beets by 3 inches
  4. Bring saucepan to boil then add beets. Reduce heat to a slow boil and boil beats for 25-40 minutes depending on the size of beets. Beets will be done when they can easily be poked with a fork. 
  5. When beets are done drain the hot water from saucepan, then fill with cool water while the beets are still in the saucepan. Keeping your hands under the water to avoid a mess, slowly peel the skins off of beets (this will be very easy). Put freshly peeled beets in a separate bowl to avoid mess and discard skins once all beets are peeled. 
    my beet peeling setup. skins on the right, peeled on the left
  6. Slice beets the put in large mason jar. 
  7. Place the sugar, vinegar, water, salt, cinnamon, and nutmeg in a saucepan. Bring to a boil then simmer for 15 minutes stirring occasionally. Pour liquid over beets in mason jar.
  8. Store in fridge and let sit for at least a week for best flavor.
  9. Additional cooked and sliced beets can be added to the mixture as you harvest more from your garden.

Kale salad with pickled watermelon rind

     There's a restaurant in Atlanta called MetroFresh. It's an amazing delicious and fairly inexpensive place to eat. The menu changes daily and it's always healthy. They also list all the allergens so that if you're on a restrictive diet you can easily pick and choose. If I lived closer I would probably eat here everyday. They have a kale salad there which is SO delicious. It's the perfect combination of earthy kale, tangy vinegar, and sweet fruit. However, for the longest time I could not figure out what the fruit was. There was the very obvious dried cranberries but there was also this pale white fruit with an almost candy-like taste and texture. Finally one day at lunch my curiosity got the best of me and it turns out though delicious little fruits were pickled watermelon rind!
    The other day we had a cookout and bought a giant watermelon. As I was cutting up the leftovers to put in the fridge I kept looking at the rind thinking what a waste. Then I remembered the pickled watermelon rind in the kale salad!! After a quick internet search I realized most pickled watermelon rind requires canning supplies and lots of time, neither of which I had (or really ever will haha). So a few more minutes of searching and I found the following recipe for pickled watermelon rind. It takes about 20 minutes of prep but it has to cool and sit awhile before you get the best flavor. I stored mine in a tupperware in the fridge and it keeps for about 10 days. We ate it with the kale salad and by itself! We went out of town before we could finish it all so I divided it into freezer baggies and froze it, I'll let you know how its texture holds up.

 
Kale Salad with Pickled Watermelon Rind

Ingredients:
  • 1 quart watermelon rind (including ½-inch of red flesh left on the rind), cut into pieces about 1-inch square (about half the rind of a small watermelon and 1/3 the rind of a large)
  • 1 cup vinegar (white vinegar or cider vinegar)
  • ½ cup water
  • 1 cup sugar
  • 2½ teaspoons table sal
  • 1 star anise (I did not have this, no one cried)
  • 1 two-inch piece of ginger, peeled and roughly chopped (did not have this either I added a couple dashes or powdered ginger)
  • ½ teaspoon cinnamon 
  • Kale (as much as you want for your salad)
  • olive oil
  • dash of balsamic vinegar  
Steps:
  1. First pickle your watermelon rind following the steps here. I tried using a vegetable peeler to peel my watermelon but it wasn't working very well so I just used a knife.  I also used apple cider vinegar because I did not have white vinegar.  It still tasted great.
  1. After you have your pickled watermelon rind, wash kale and remove the tough stems (I do this  by folding it in half and cutting down the one side with the leaf).
  2. "Massage" the kale with enough olive oil to lightly coat all leaves
  3.  Add a dash of balsamic vinegar, less is more, you can always taste and add more if you want. 
  4. Dice pickled watermelon rind into smaller pieces ( I like it about 1/4" to 1/2" thick) and add to salad. Toss to combine. 
  5. Add any dried fruits or slivered almonds if you would like. I just ate mine with the watermelon rind. 
  6. ENJOY :)

Wednesday, June 19, 2013

I have a garden!

This post is not going to include a recipe. It may have some useful info on doing your own vegetable garden though. Keep in mind, this was my first time planting anything edible. Last year I had some tomatoes in pots but that was it. So if I can do it, so can you. It wasn't nearly as complicated as the numerous gardening blogs and magazines etc make it seem.

     This summer Joseph and I have our first vegetable garden! We're located in Atlanta so we planted kale, broccoli, carrots, spinach, beets, lettuce, and onions toward the end of march. We had a couple more frosts after that and we were worried but our garden is doing fantastic!! Two weeks ago (mid May) mom came to visit and she helped me plant two tomato plants and one yellow bell pepper plant as well as some acorn squash and two rows of bush beans.
     Prepping the garden was the hardest part and even that was pretty easy. Our yard already had a fenced in area that had been used as a playground for the previous tenants children. It looked like the whole area was mulched but when we started to dig around we realized that under the layer of mulch was black plastic sheeting. We kept it in place and scraped the mulch off of it where we wanted to plant our rows then we used a utility knife to cut long lines in the black sheeting. Underneath the soil was great! We mixed in a little bit of mushroom compost (Just poured it in a line down the row) then planted our seeds according to the package instructions. We also planted about 12 marigold plants around the perimeter because we heard they keep out pests but a lot of them died in the frost. Oh well.
     For the past couple weeks we've been harvesting the kale, spinach and  lettuce. We could have been doing it earlier and eating baby spinach etc but I wasn't really sure if we could or not (I know that sounds silly- I can be a very by the book person haha so I was scared of doing anything wrong)
Having a garden has been really fun and because of the mulch that was already there weeding is not that hard. We decided to keep everything chemical free so we haven't used any weed killer or store bought pesticide on the plants. Every few days I go out and rake in between the plants with a small hand rake to get rid of the majority of weeds. It takes like a half hour max.
     As far as pesticide, I looked up a homemade non toxic one and bought a large spray bottle from Home Depot and put the mixture in there. I keep it in the shed and I try to spray the plants after it rains. Sometimes I forget, but its not the end of the world. Our spinach has some little chewed holes in it but we just wash it off and eat it anyways (I looked it up- its safe haha yes I google everything). I will include the homemade pesticide recipe at the bottom of this post.
   Having all these leafy greens in our garden has been great. It saves so much money especially because Joseph and I have become pretty healthy eaters and we were buying like 2 big containers of those pre-washed salads a week.  I learned the hard way that a salad spinner is one of the best investments ever. After picking the greens I put them in a mixing bowl with cold water (and a few ice cubes) I let them soak for like 4 minutes and swirl them around a couple times to wash them off. If they're really dirty, I'll empty and refill the mixing bowl a couple times to get rid of the water. Drying the greens I've found is the most important part and it can be hard without a salad spinner. After a couple tries of blotting my lettuce with paper towels and still finding gross wilted lettuce in the fridge the next day, I gave up and went to Target to buy a salad spinner. It's really fun to use haha. They only had the small salad herb spinners left but that's fine I just do a couple batches. To keep our greens fresh I fold up a couple paper towels and put them at the bottom of plastic salad containers we've kept from our store bought salad mixes. Then I put the greens on top and another paper towel folded up at the top. This helps keep moisture away from it and if the paper towel gets really wet I just replace with a dry one.
    I'm hoping my tomato plants do well. The acorn squash we got is actually some seeds that Joseph saved from one we bought and cooked (the recipe is on this blog!). He saved the seeds and put them in Tupperware with damp paper towels in the fridge. I rolled my eyes like usual. A little later he put them in a cup and put some dirt on top. Again, I sighed, but I've learned to tolerate his eccentricities haha. However a couple weeks later I was eating my words. Every seed had turned into a tiny seedling. When my mom was here, we separated the tightly packed seedling and planted about 6 each in the top of some mounds we had made in the garden. Two weeks later and they're doing great! The acorn squash is the one part of the garden I didn't even google a little bit haha so we'll see how it turns out.

Homemade SAFE NATURAL garden pesticide:
The Caffeine keeps aphids away, the herbs keep most insects, mosquitoes and squirrels etc away, and the soap works really well on soft-bodied insects.

1. Gather any or all of the herbs, spices, and roots listed below 
(in any form although fresh is best):
lavender
catnip
thyme
horseradish
garlic
onions
ginger
mint
rhubarb
cayenne

2. Place in a crock pot with 2 tbsp coffee grounds (used or fresh)

3. Add enough water to cover your mixture plus about 4 cups. 

4. Cook on low for up to 24 hours and atleast six hours. 

5. Let mixture cool and sit overnight, then strain it and discard solids

6. Add 2 tbsp of liquid soap to mixture (use a biodegradable one- it will say on bottle, my dishsoap was and it was just from walgreens)

7. Use a funnel or a friend! to pour into a spray bottle. You can keep extra in the fridge (just make sure to clearly label it as non-edible!)